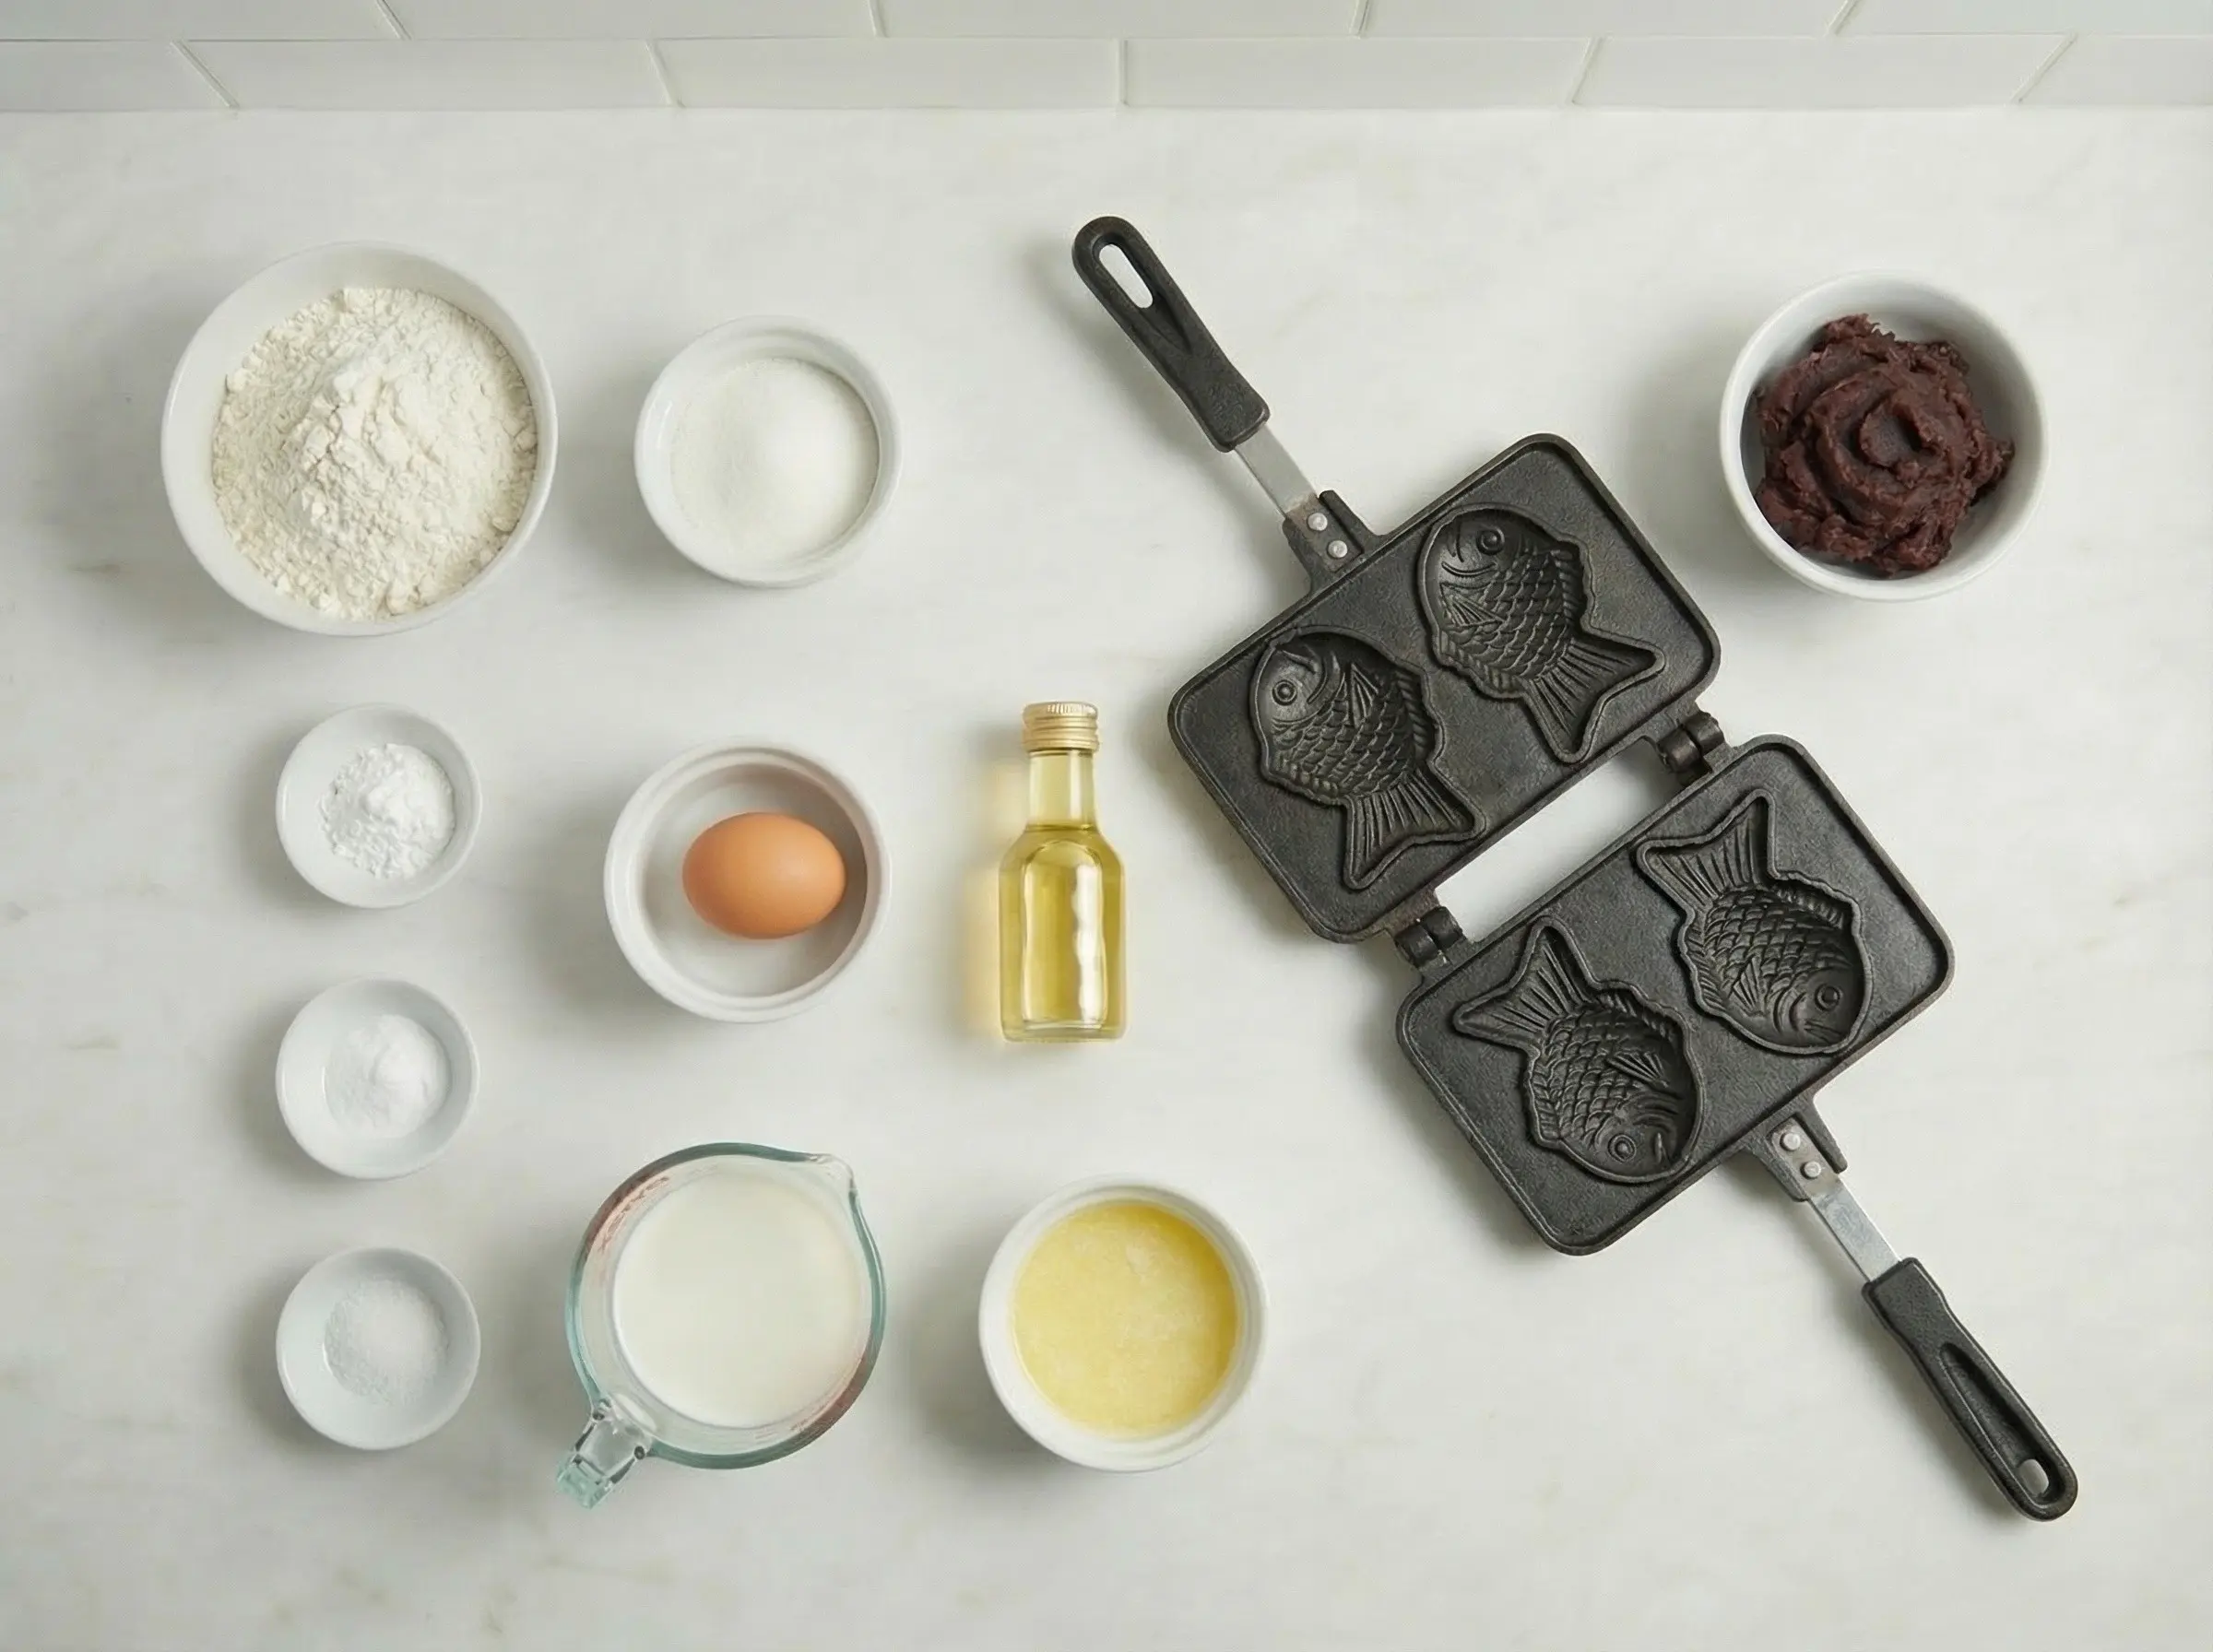
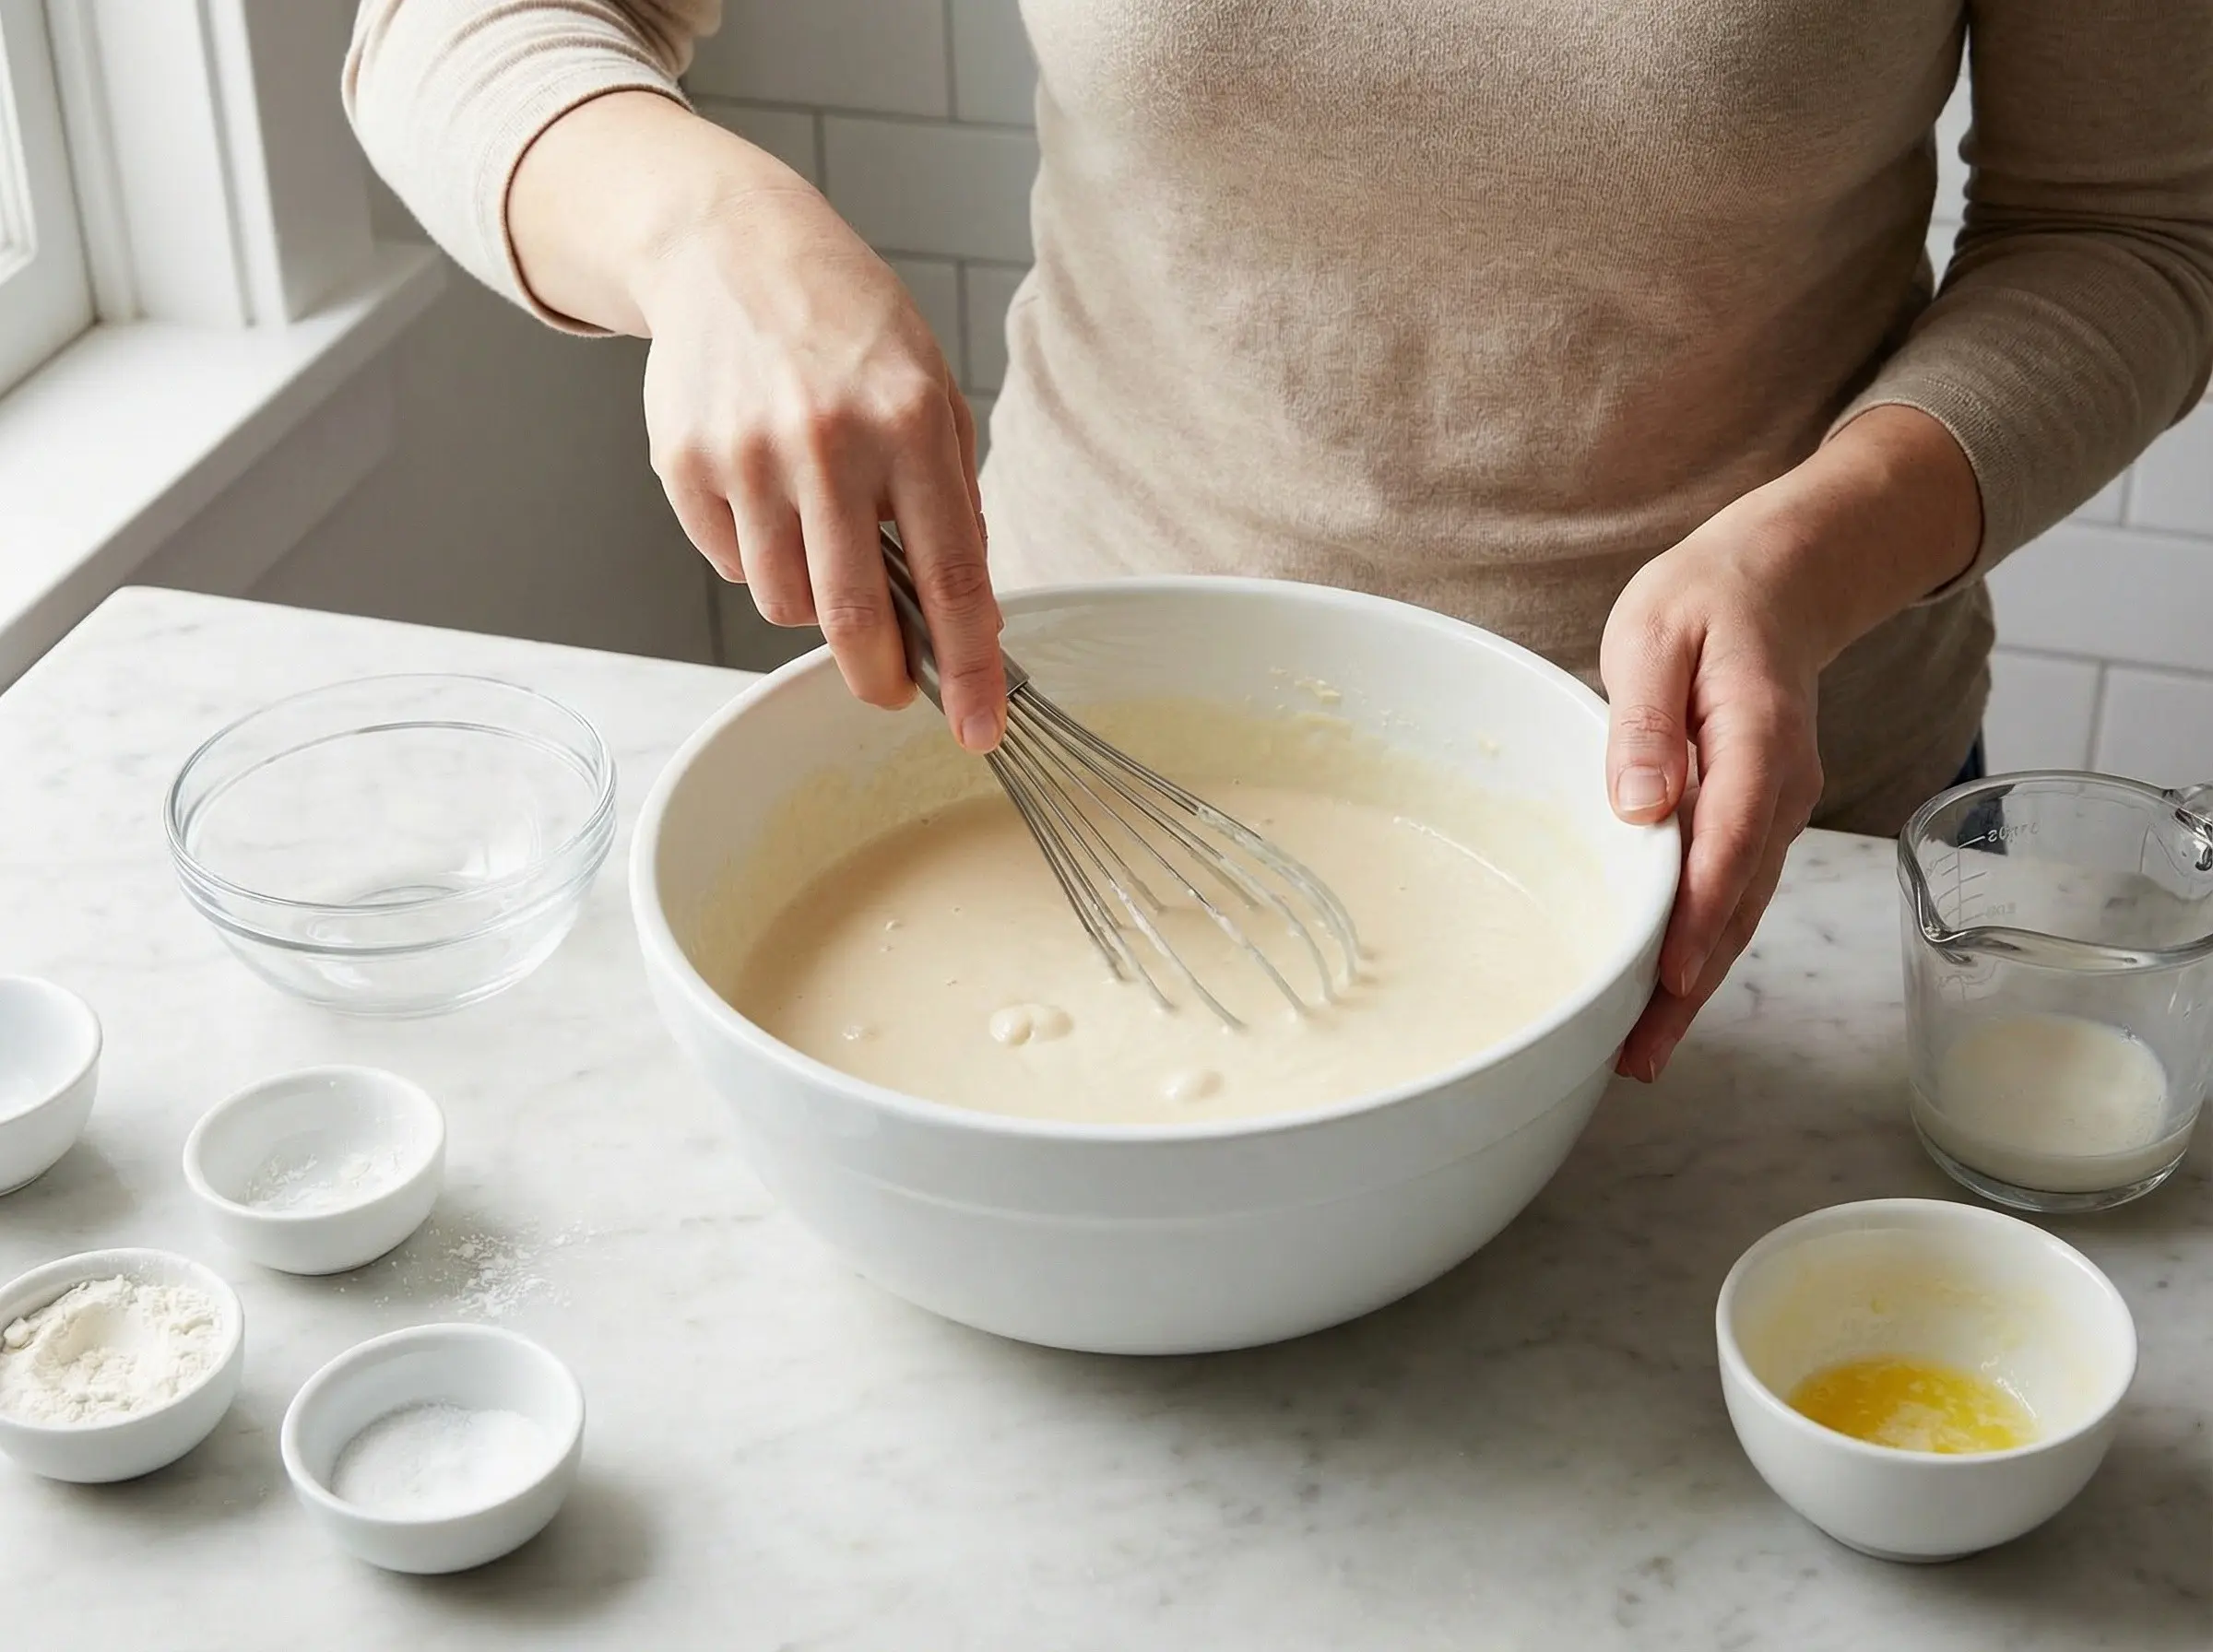
1Make the taiyaki batter. In a large bowl, whisk together the flour, sugar, baking powder, baking soda, and salt. In a separate bowl or measuring cup, whisk together the egg, milk, melted butter, and vanilla extract until well combined. Pour the wet ingredients into the dry ingredients and whisk until just smooth - a few small lumps are fine and preferable to overmixing, which develops gluten and makes the batter tough. The consistency should be similar to pancake batter, flowing easily but not watery. If too thick, add milk a tablespoon at a time. Let the batter rest for 10-15 minutes at room temperature - this allows the flour to hydrate and any bubbles to settle, resulting in a smoother, more consistent cake.
2While the batter rests, prepare the filling. If using store-bought anko (red bean paste), divide it into portions of about 1.5-2 tablespoons each and shape them roughly to fit the fish mold - slightly oval and flat. Having the filling pre-portioned makes the assembly process much faster and more consistent. You can use either koshian (smooth) or tsubuan (chunky) red bean paste. If making your own anko, ensure it has cooled completely and is thick enough to hold its shape - runny anko will leak out during cooking. For alternative fillings, prepare similar-sized portions of custard cream, Nutella, sweetened cream cheese, or sweet potato paste.
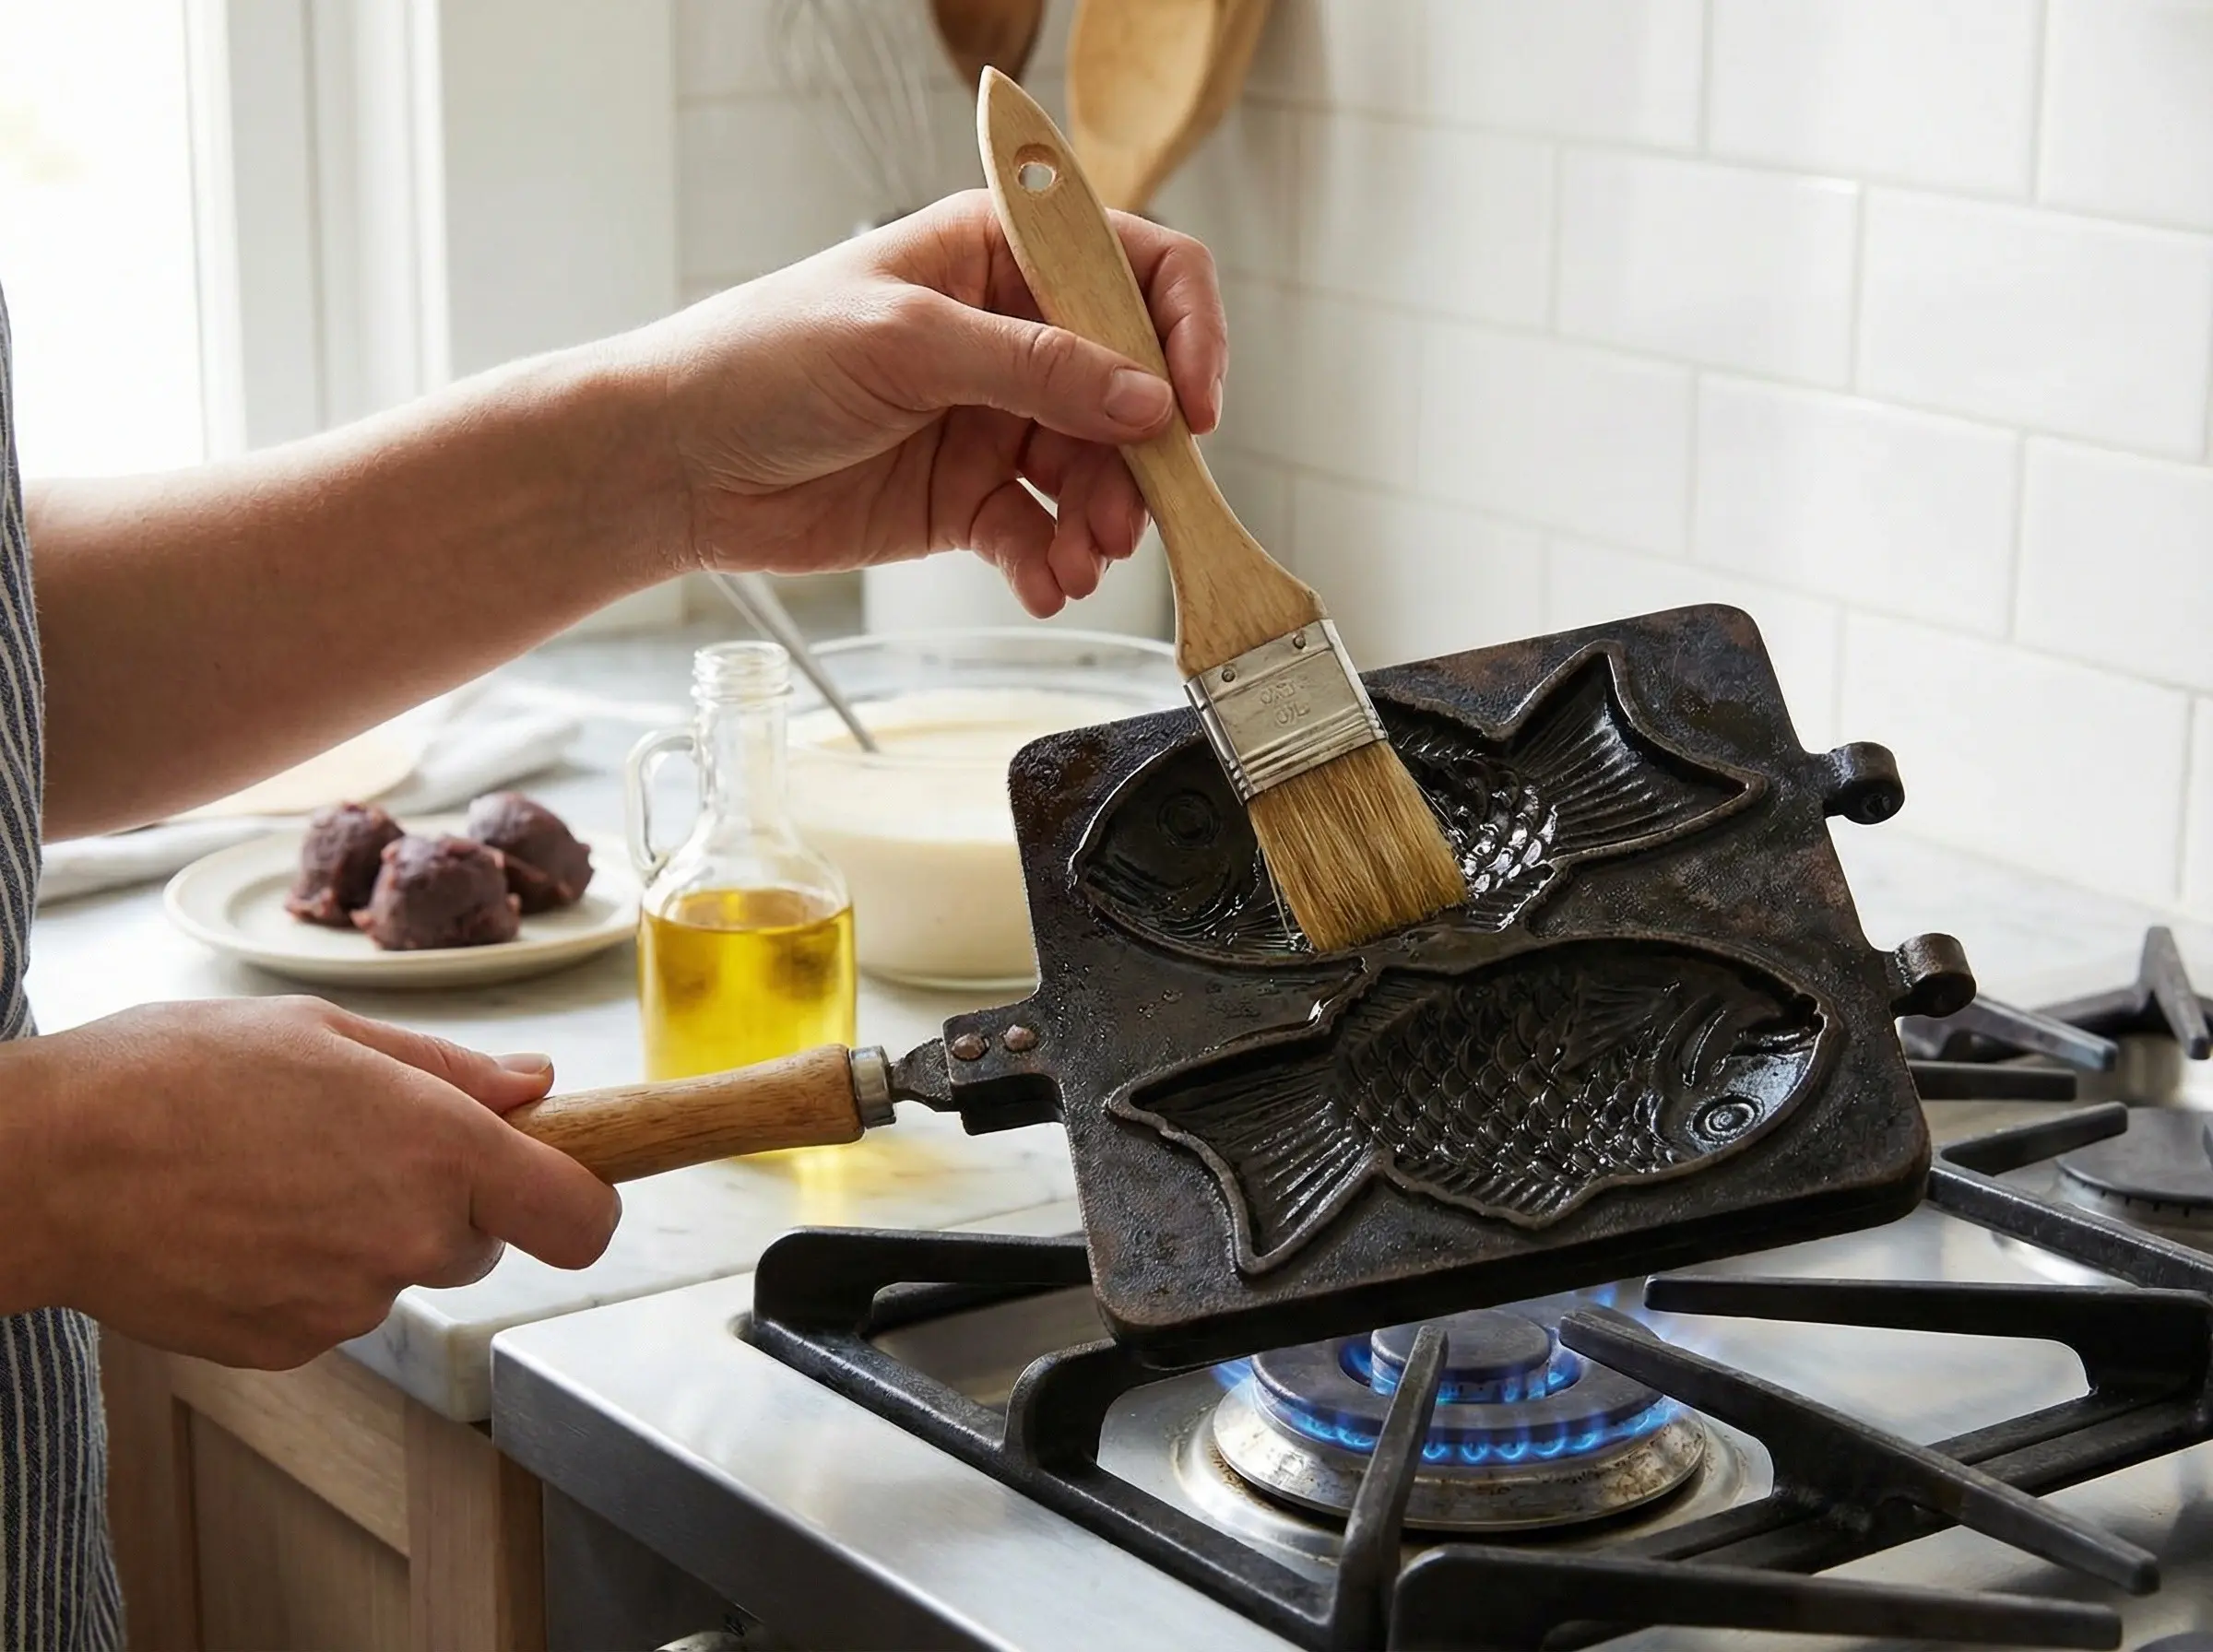
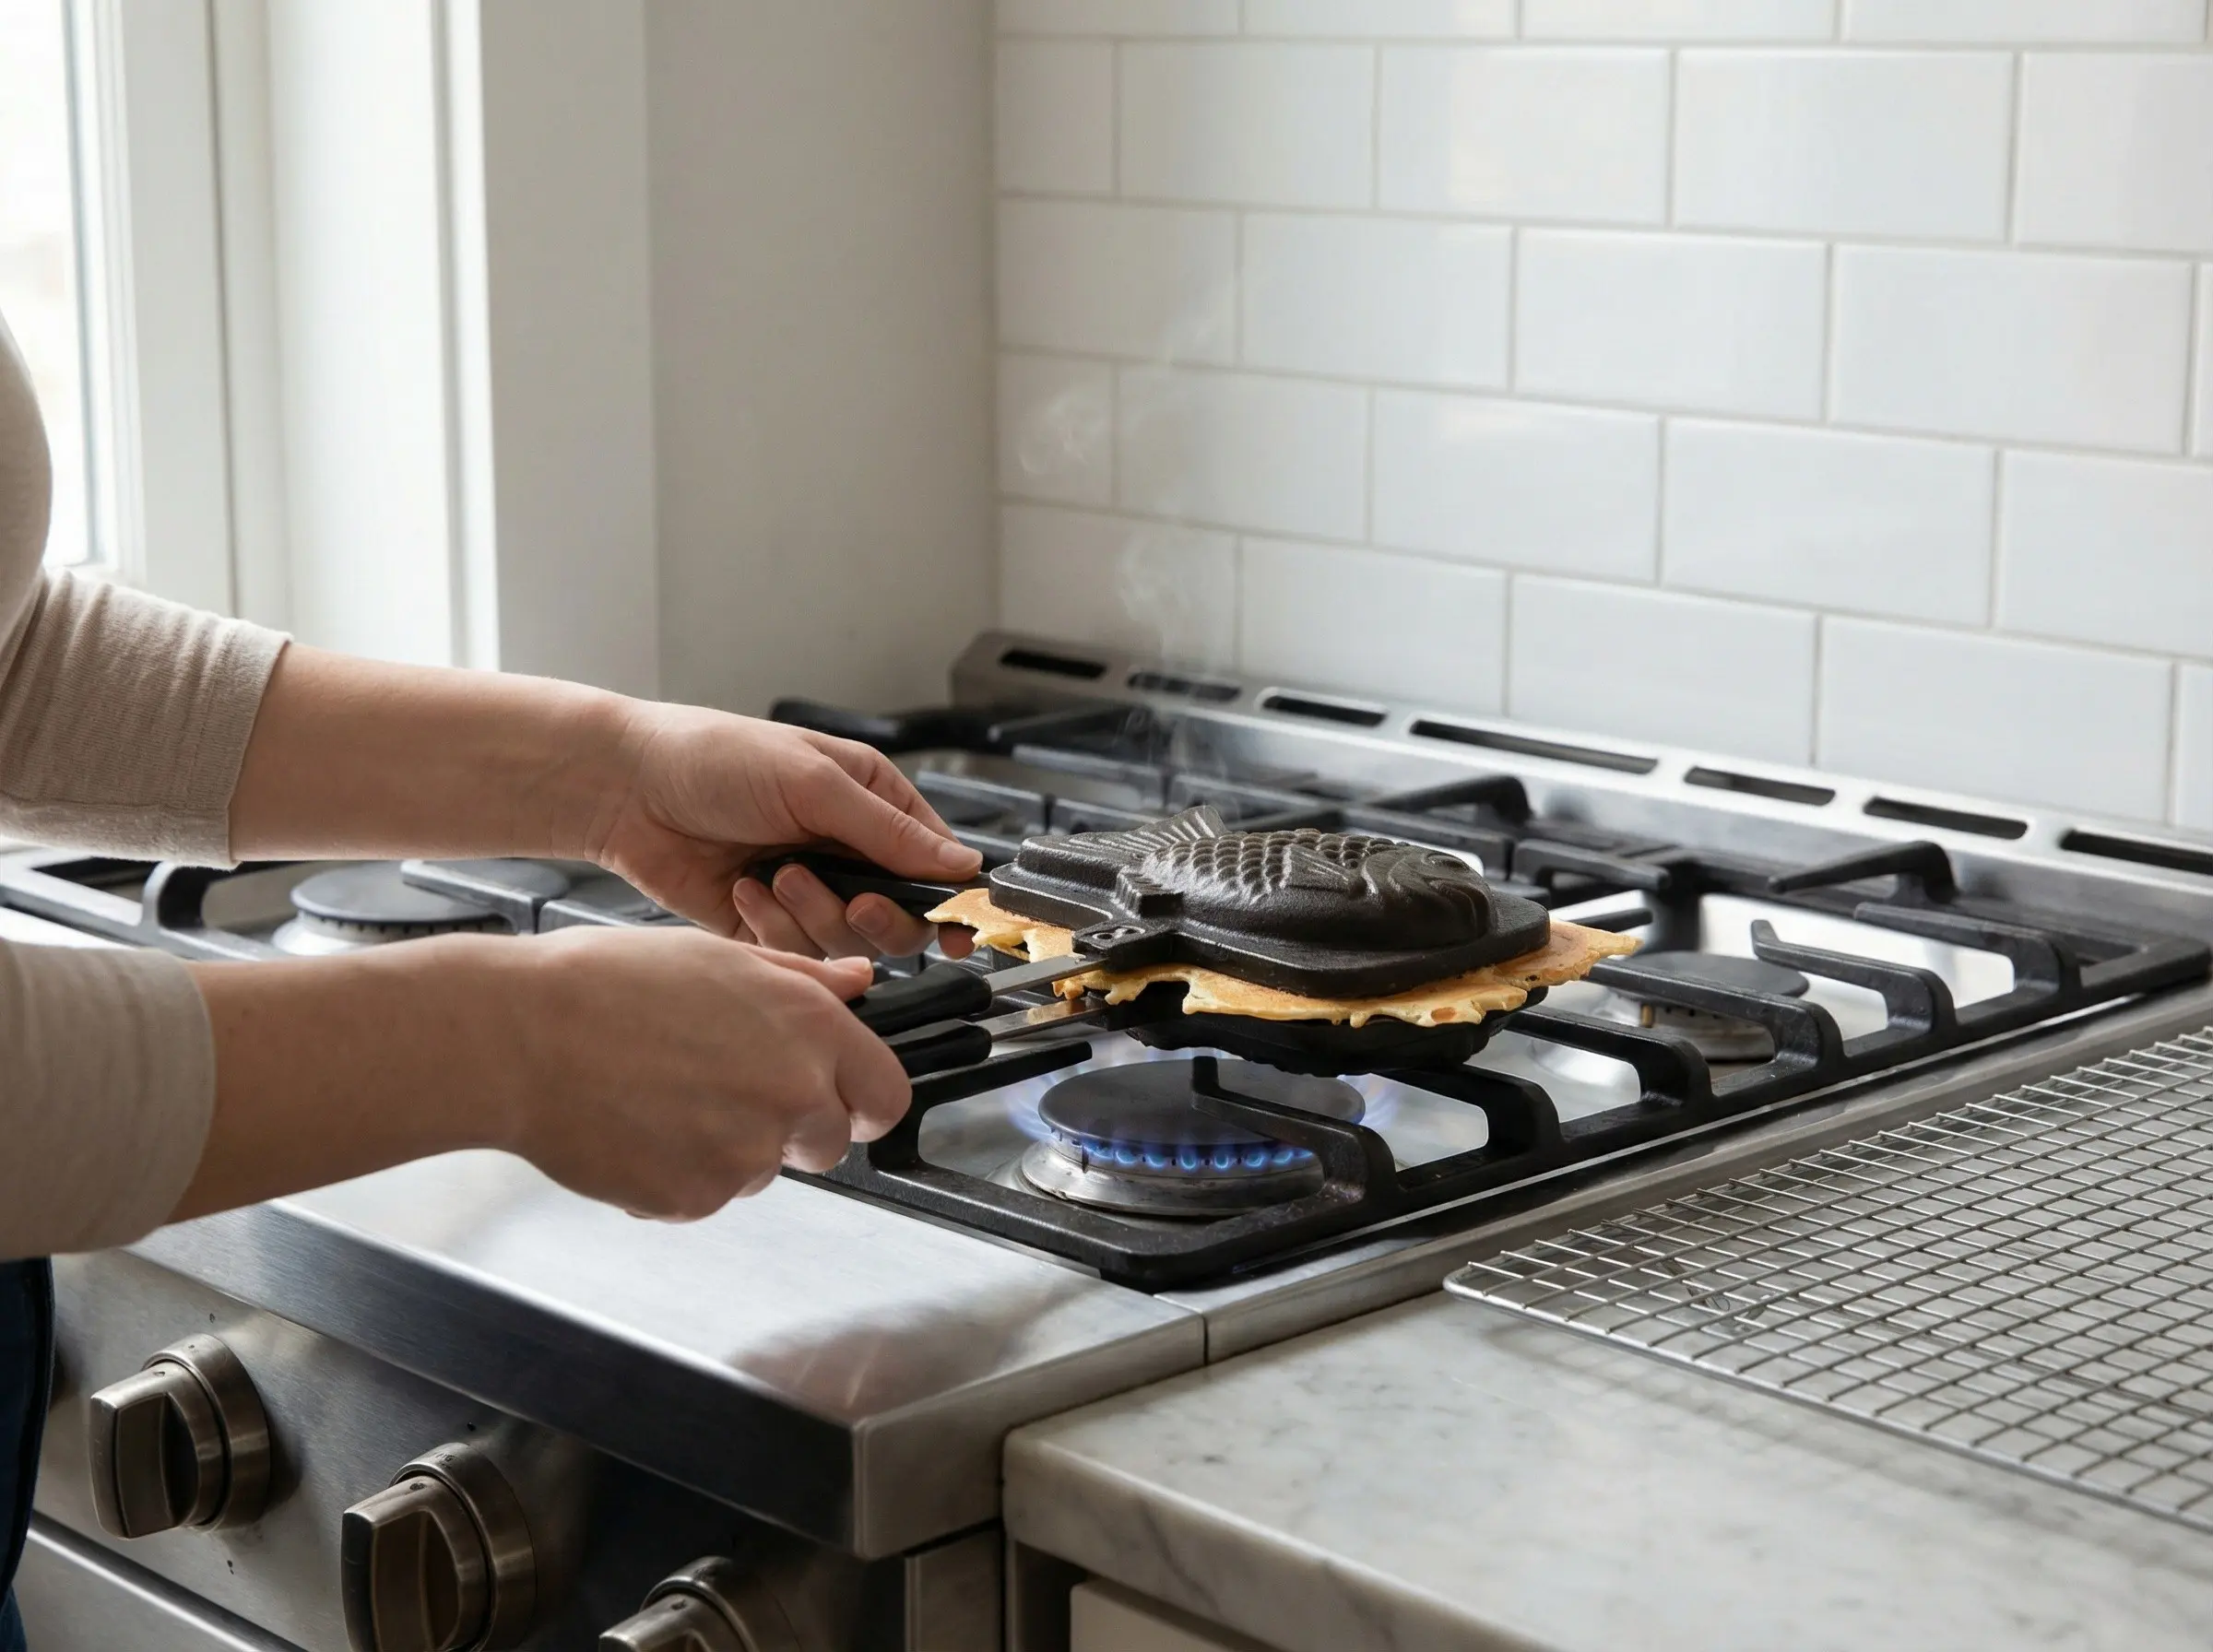
3Heat your taiyaki pan over medium-low heat. If using a stovetop cast-iron taiyaki mold, heat both sides evenly by flipping it a few times. If using an electric taiyaki maker, preheat according to the manufacturer''s instructions. Lightly brush or spray both sides of the mold with vegetable oil - this prevents sticking and helps create a golden, crispy exterior. The pan is ready when a small drop of batter sizzles gently upon contact - if it sizzles violently, the pan is too hot and will burn the outside before the inside cooks.
4Fill one side of the taiyaki mold with batter, filling the fish cavity about 70% full. The batter should flow into all the details of the mold - the fins, tail, and head. Place a portion of anko in the center of the batter, pressing it down gently. The filling should sit on top of the batter but not touch the edges of the mold - leave a border of batter around the filling so the two halves can seal together. Add a small spoonful of additional batter on top of the anko to help seal. Repeat with the other side of the mold if it has two cavities.
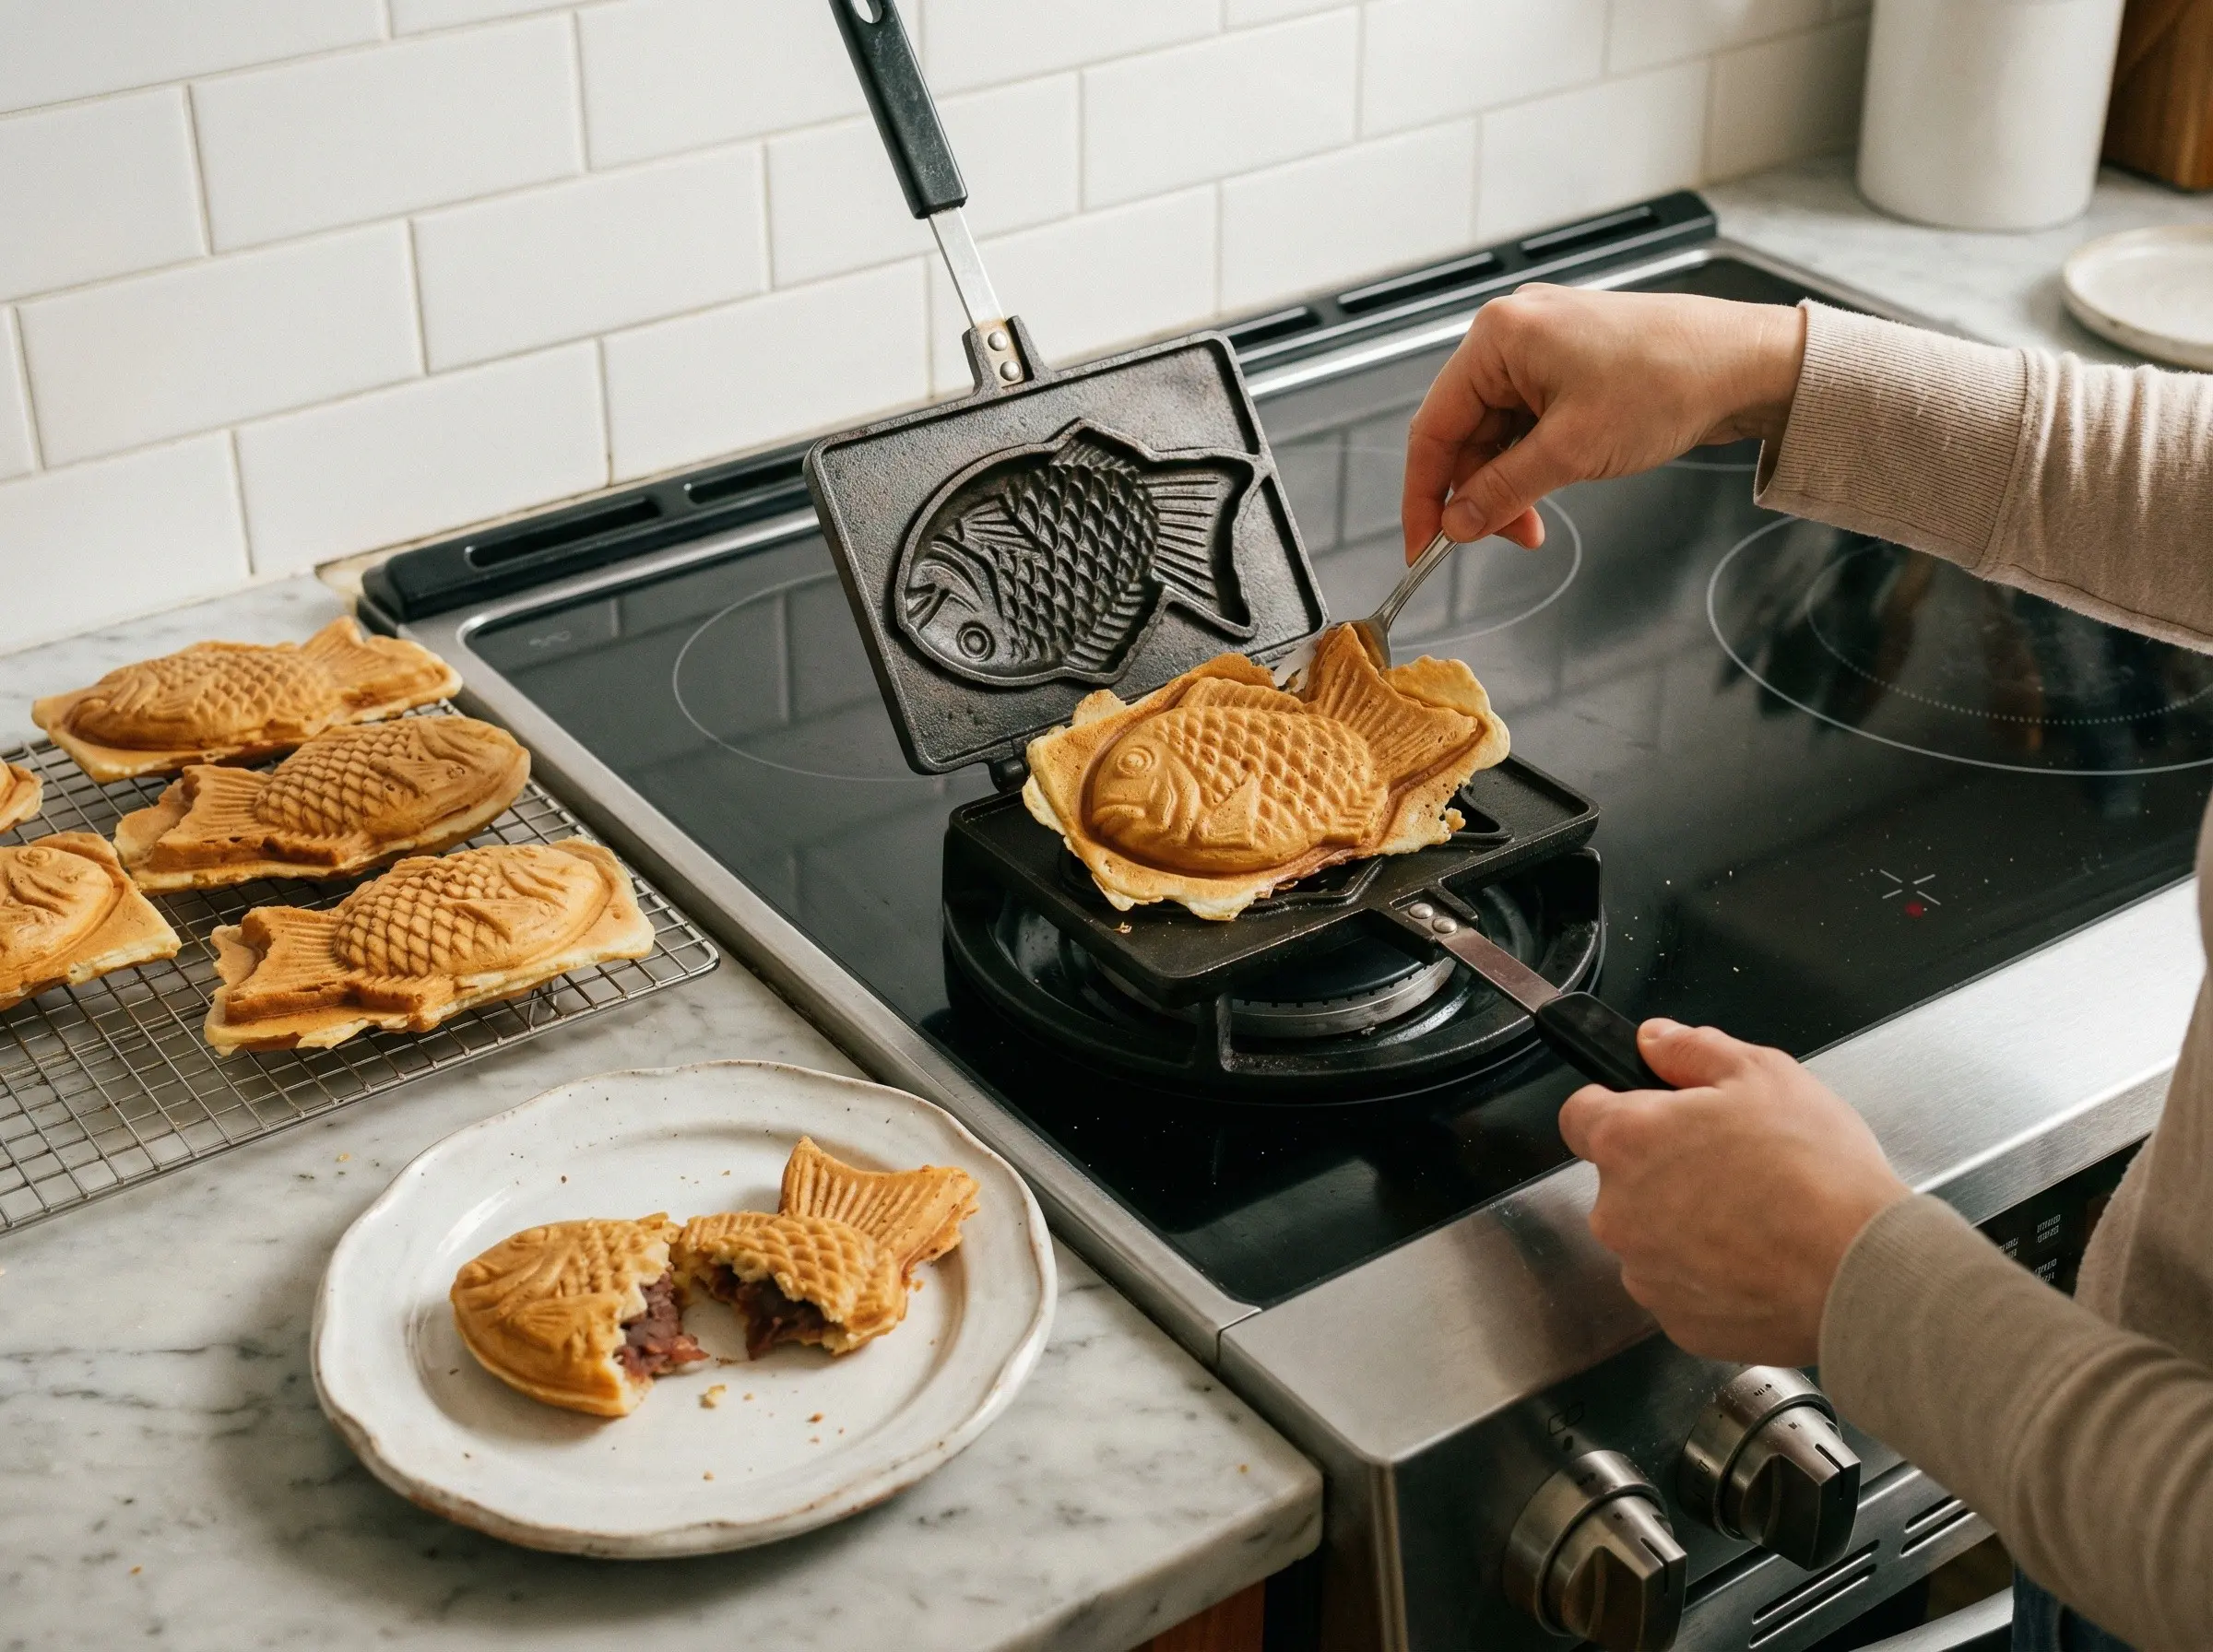
5Close the taiyaki mold firmly, pressing the two halves together. Any excess batter that squeezes out around the edges is normal and will create the characteristic thin, crispy fins or border that many people consider the best part. Cook over medium-low heat for 2-3 minutes on the first side until the bottom is golden brown. Flip the mold and cook for another 2-3 minutes on the second side. The total cooking time is about 4-6 minutes depending on your heat source. You may need to adjust the heat - too high and the outside burns while the inside stays raw, too low and the taiyaki will be pale and soft instead of crispy and golden.
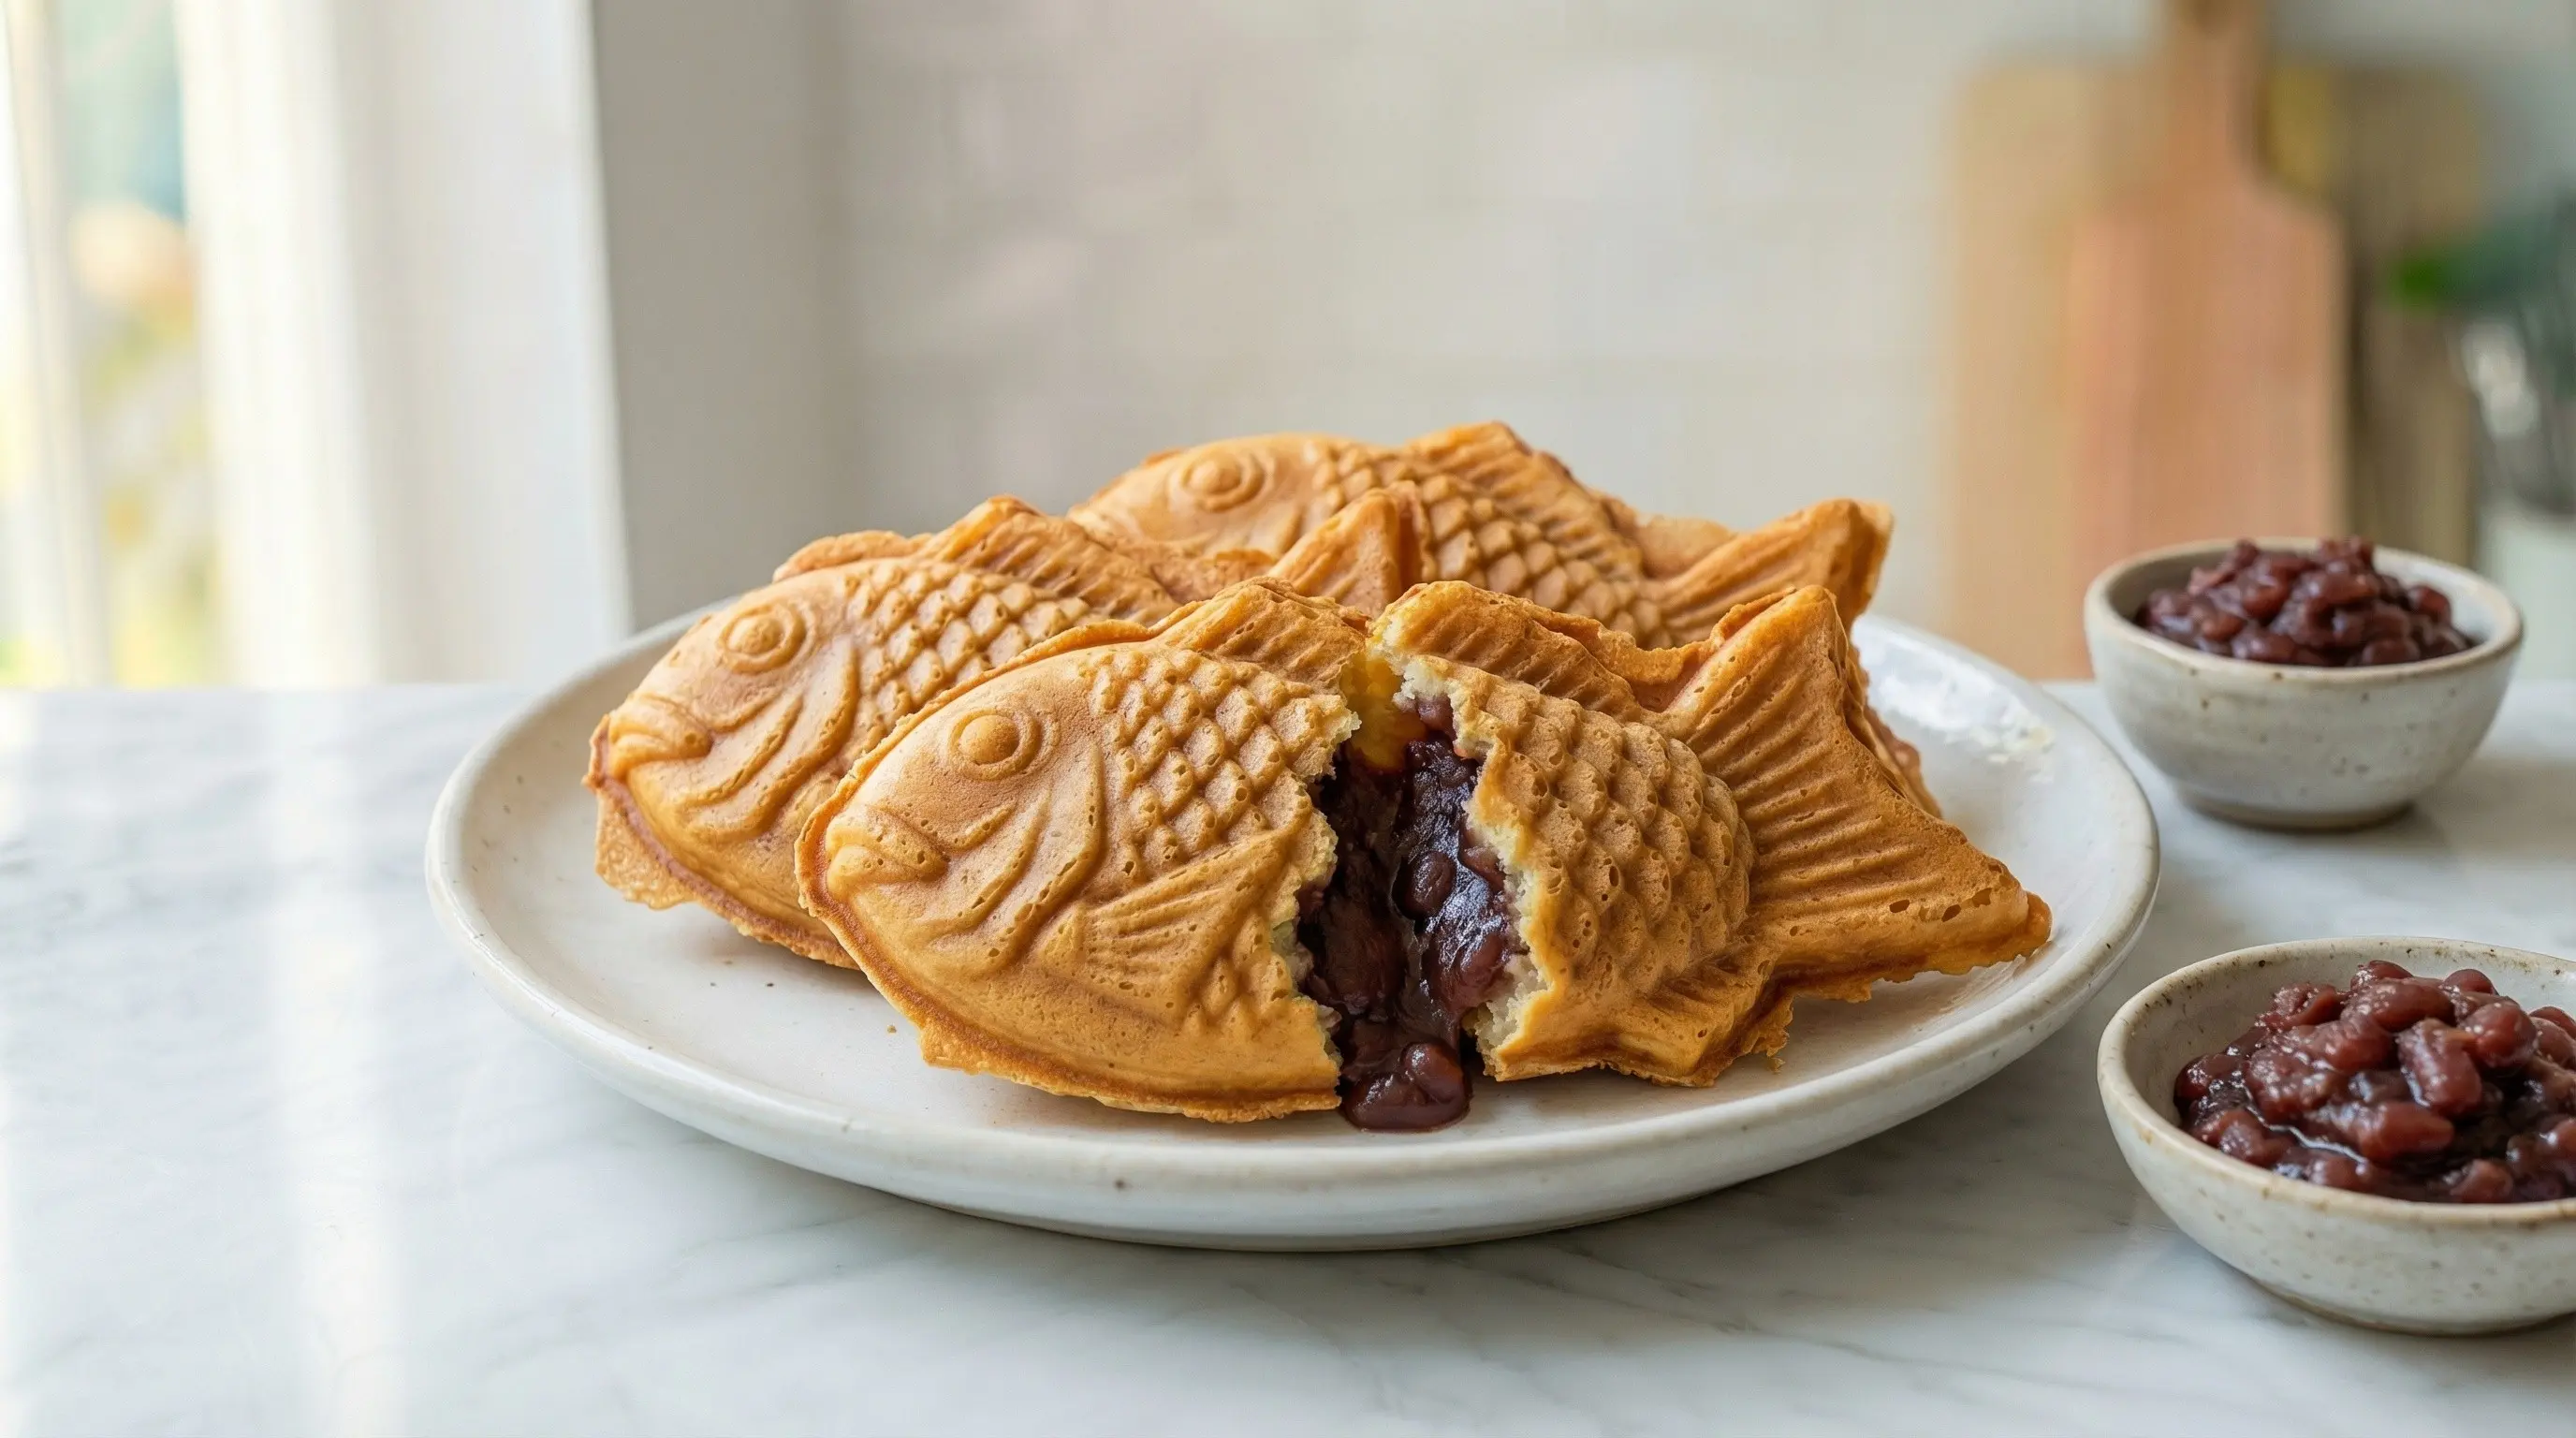
6Carefully open the mold and remove the taiyaki using a fork, chopsticks, or the tip of a butter knife. The fish should be golden brown all over with visible scale and fin details from the mold. Trim any excess batter around the edges with scissors if desired, or leave it for extra crunch - this crispy overflow, called the hane (wings), is a sought-after feature at many taiyaki shops. Place the finished taiyaki on a wire rack rather than a plate to keep the bottom from becoming soggy from steam. Repeat with the remaining batter and filling, re-oiling the mold between batches. Serve immediately while hot and crispy - taiyaki are best eaten within minutes of cooking, when the shell is still crunchy and the anko inside is warm and gooey. Hold by the tail and bite from the head, or eat from the tail up - there is no wrong way. Leftover taiyaki can be stored in an airtight container and reheated in a toaster oven or dry skillet to re-crisp, but they are never quite as good as fresh.